design elements are used to make a document more
Google Slides: How to design a document

Google Slides is becoming more and more popular. As the world takes a step away from the office and embraces the benefits of remote working, more people are turning towards Google to provide a digital platform for creating, editing and sharing files across teams.
The Google office suite comes free with any gmail account and provides high quality, web-based software for text editing, spreadsheets and presentation design. This tutorial will show you how to set up, lay out and export a document in Google Slides, using the same basic design principles you would use in any other program.
For more guides on different creative software, see our Photoshop tutorials and Maya tutorials.
01. Create a new document
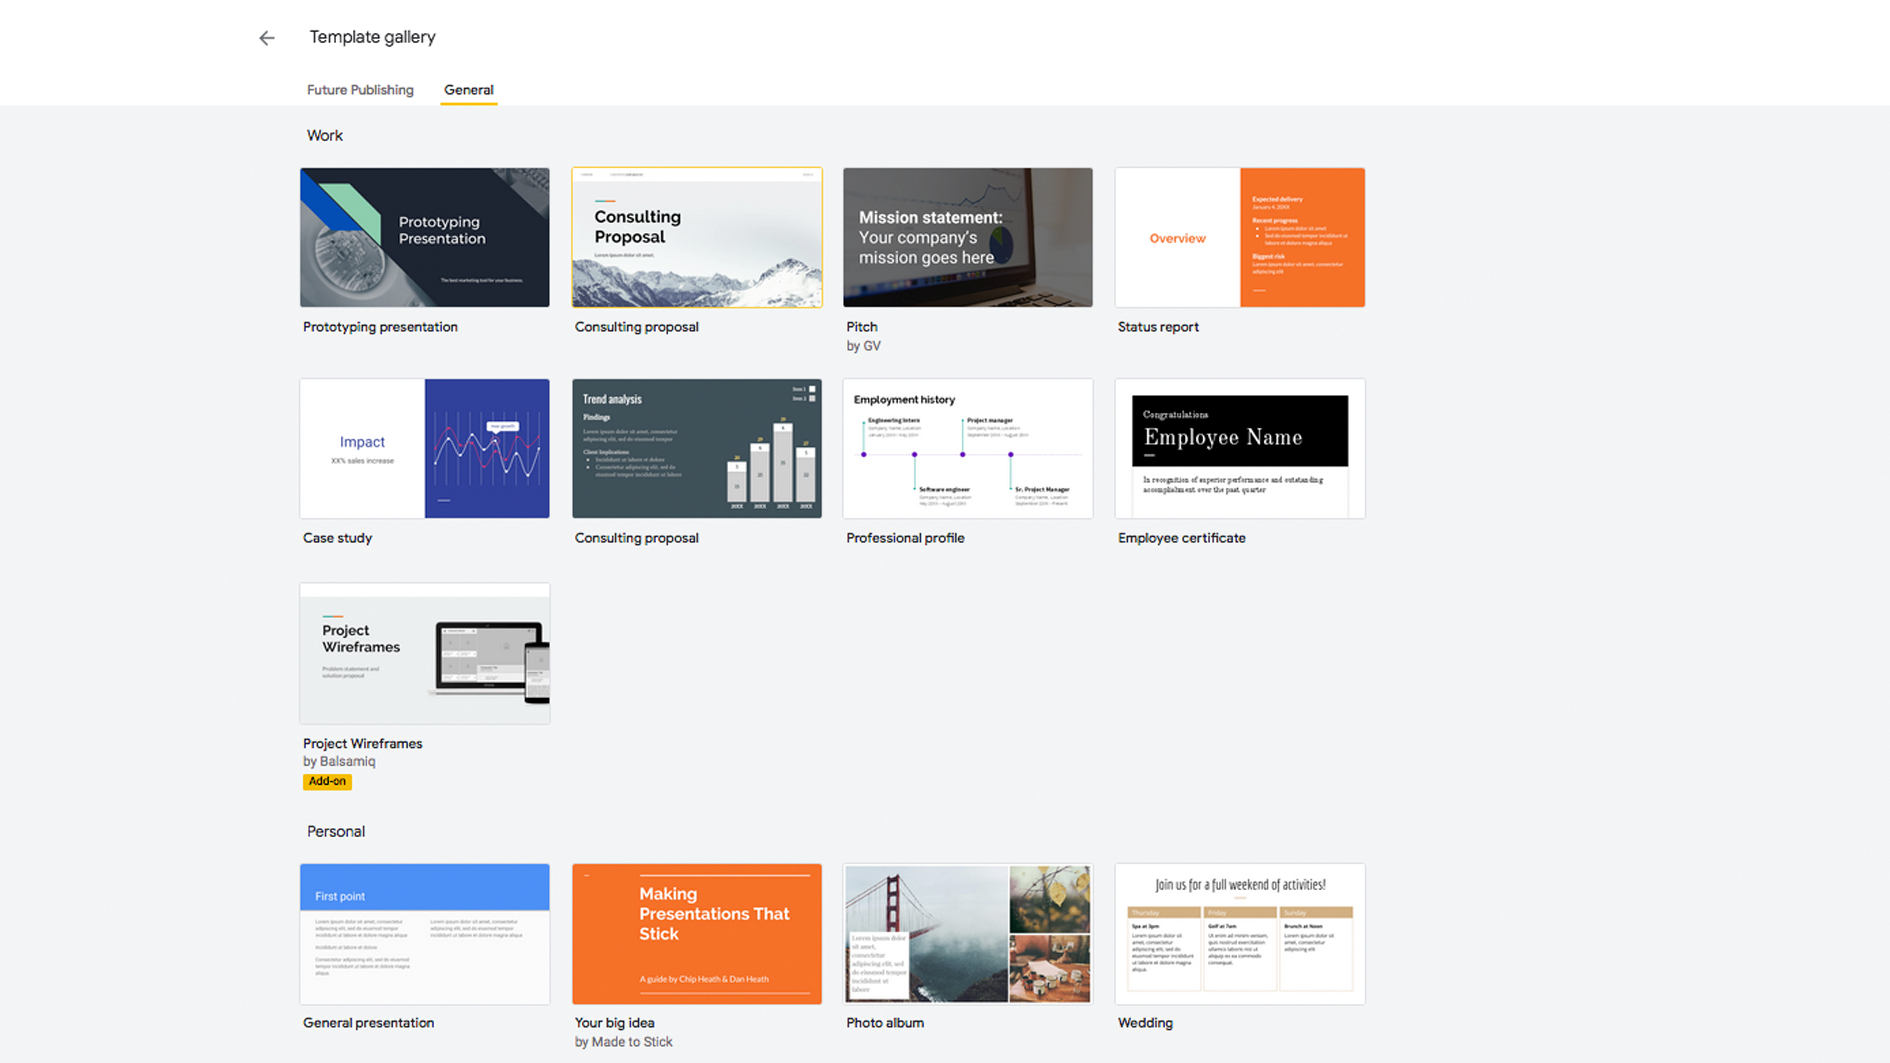
To access Google Slides, open your gmail account and click on the 'apps' icon (nine dots in a square shape) in the top-right corner. The Slides homepage presents you with a list of any recently opened presentations, for quick and easy access, as well as a gallery of templates, to help you start a new presentation. For this tutorial, we will be starting with a clean slate, so click on 'blank presentation' in the Templates panel.
02. Explore the interface
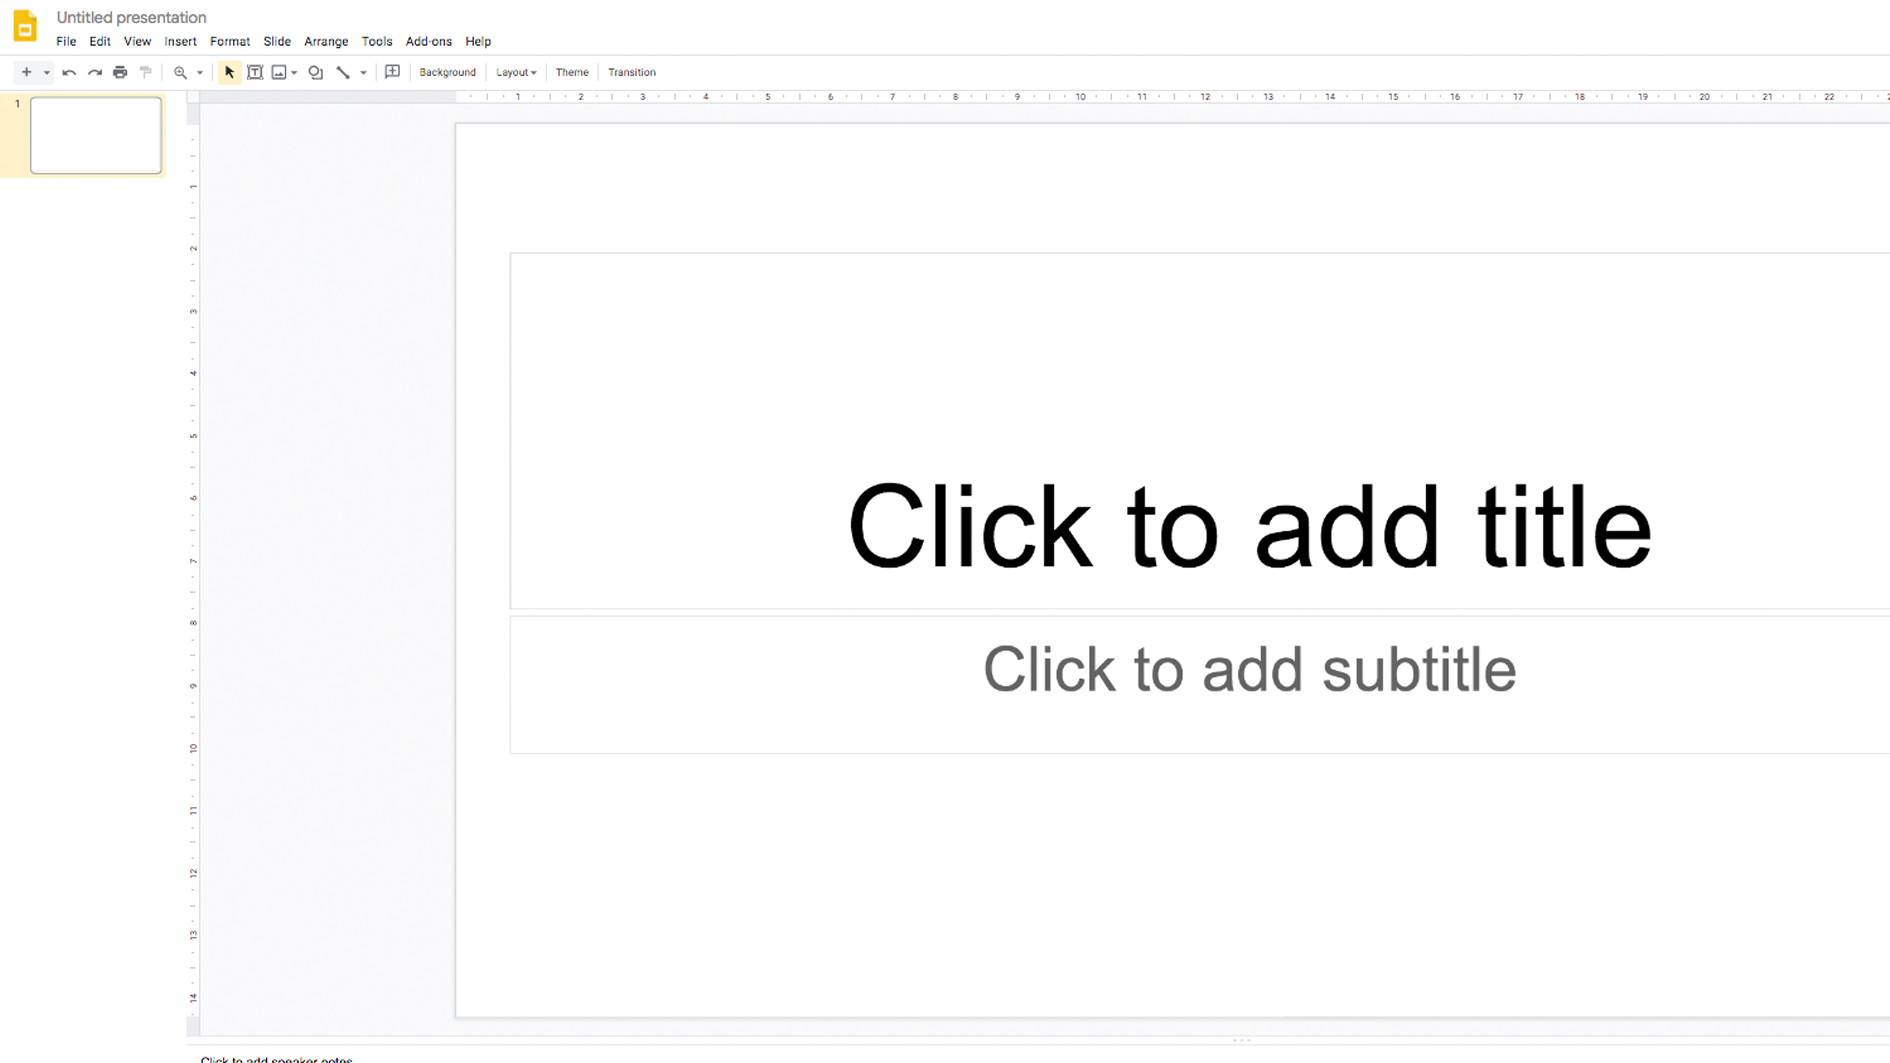
The Google Slides interface should be relatively intuitive to anyone familiar with similar apps, however it can be a little clunky for designers coming from more bespoke design software. The menu bar at the top contains drop down menus that are used to control your document, while the toolbar beneath gives quick access to a range of tools, which are used for adding and editing page content.
The panel on the left displays all pages for navigation, while the right side is used as a functional space for viewing various tabs at different stages. When the document is first opened, this space will be filled with the Themes tab, which displays a catalogue of ready-made styles. These can be helpful if you're in a hurry and simply want a standard layout to drop content into.
The three icons to the extreme right of the page are Calendar, Keep and Tasks. We will come back to these later.
03. Adjust document size
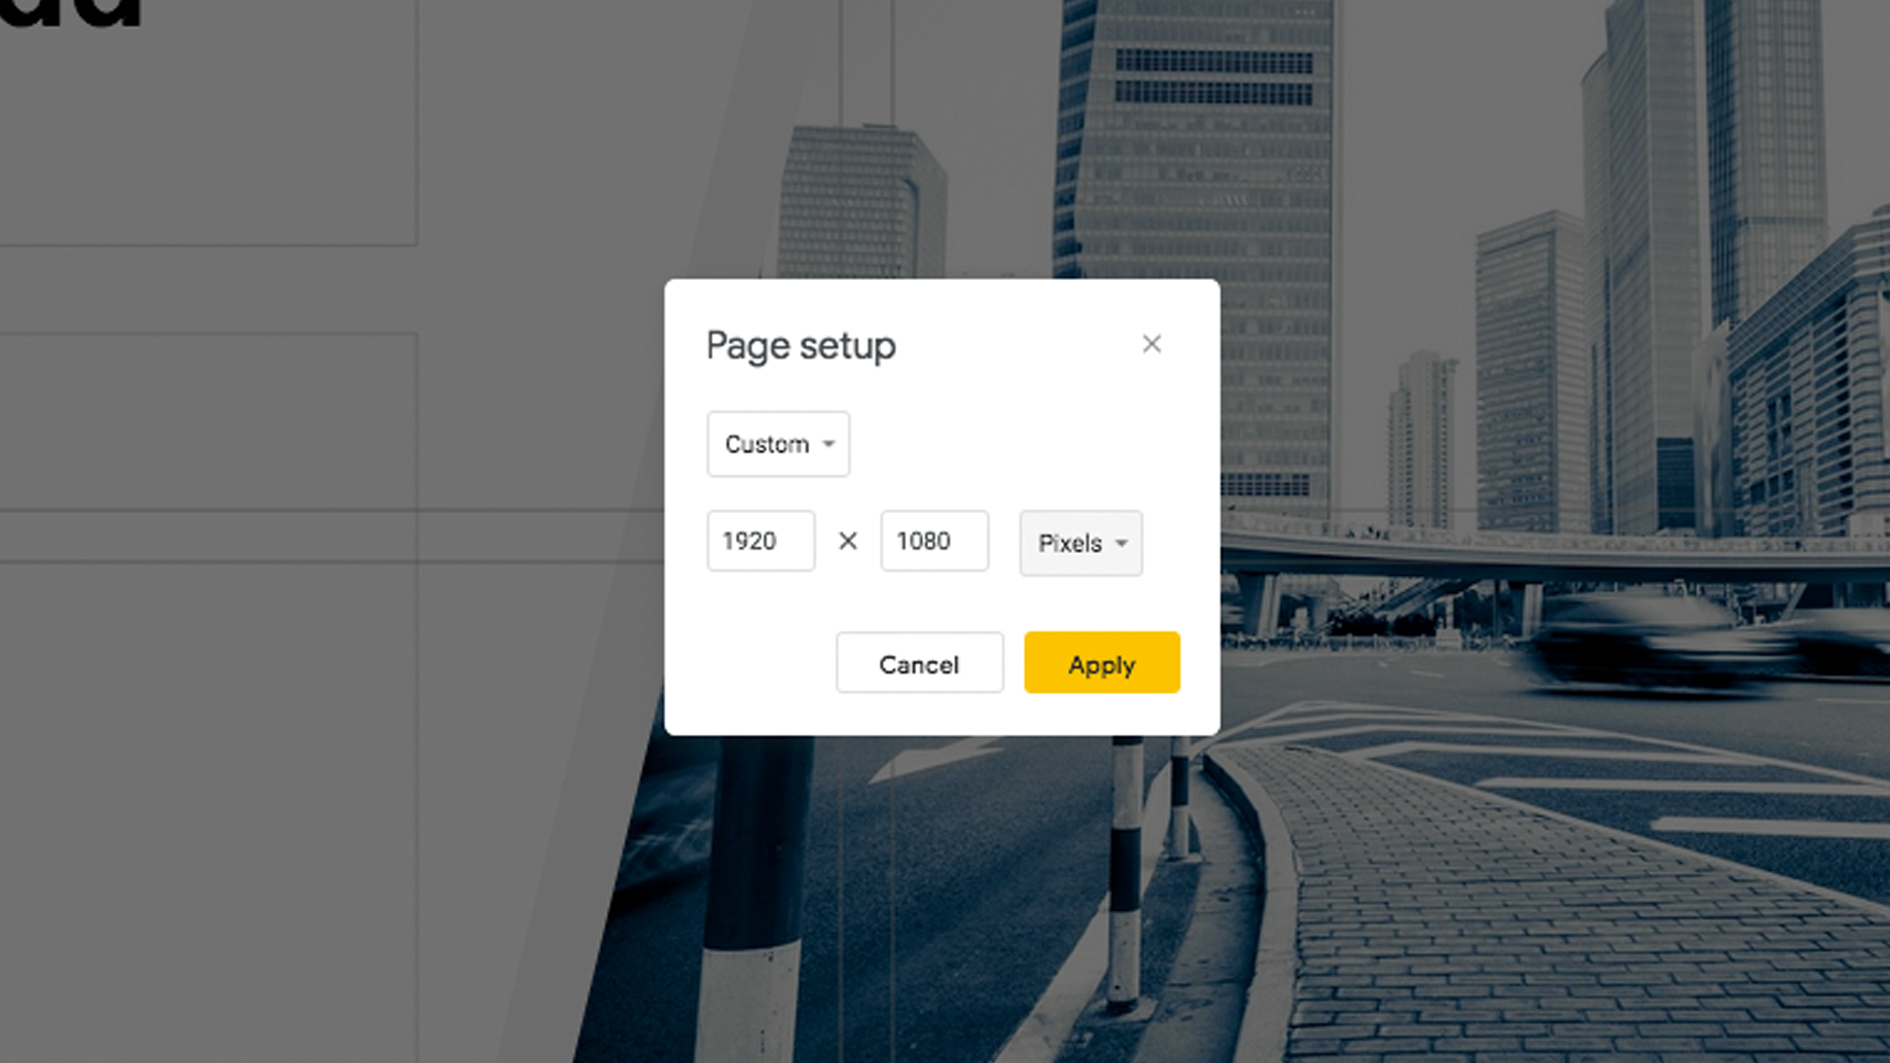
Before doing anything, decide on the size you want for your project. The document size can be changed in File > Page Setup. The default is 16:9, which is a standard aspect ratio for screens, but the drop-down also offers you 4:3, 16:10 and Custom. If your presentation has black space around the edges, when viewed on your desired device, you may have the wrong size and need to adjust. The Custom option makes this software incredibly versatile, as it allows you to input your own dimensions (in inches, centimeters, points and pixels), effectively allowing you to use Google Slides for any print and web design project.
04. Set up a Master Slide
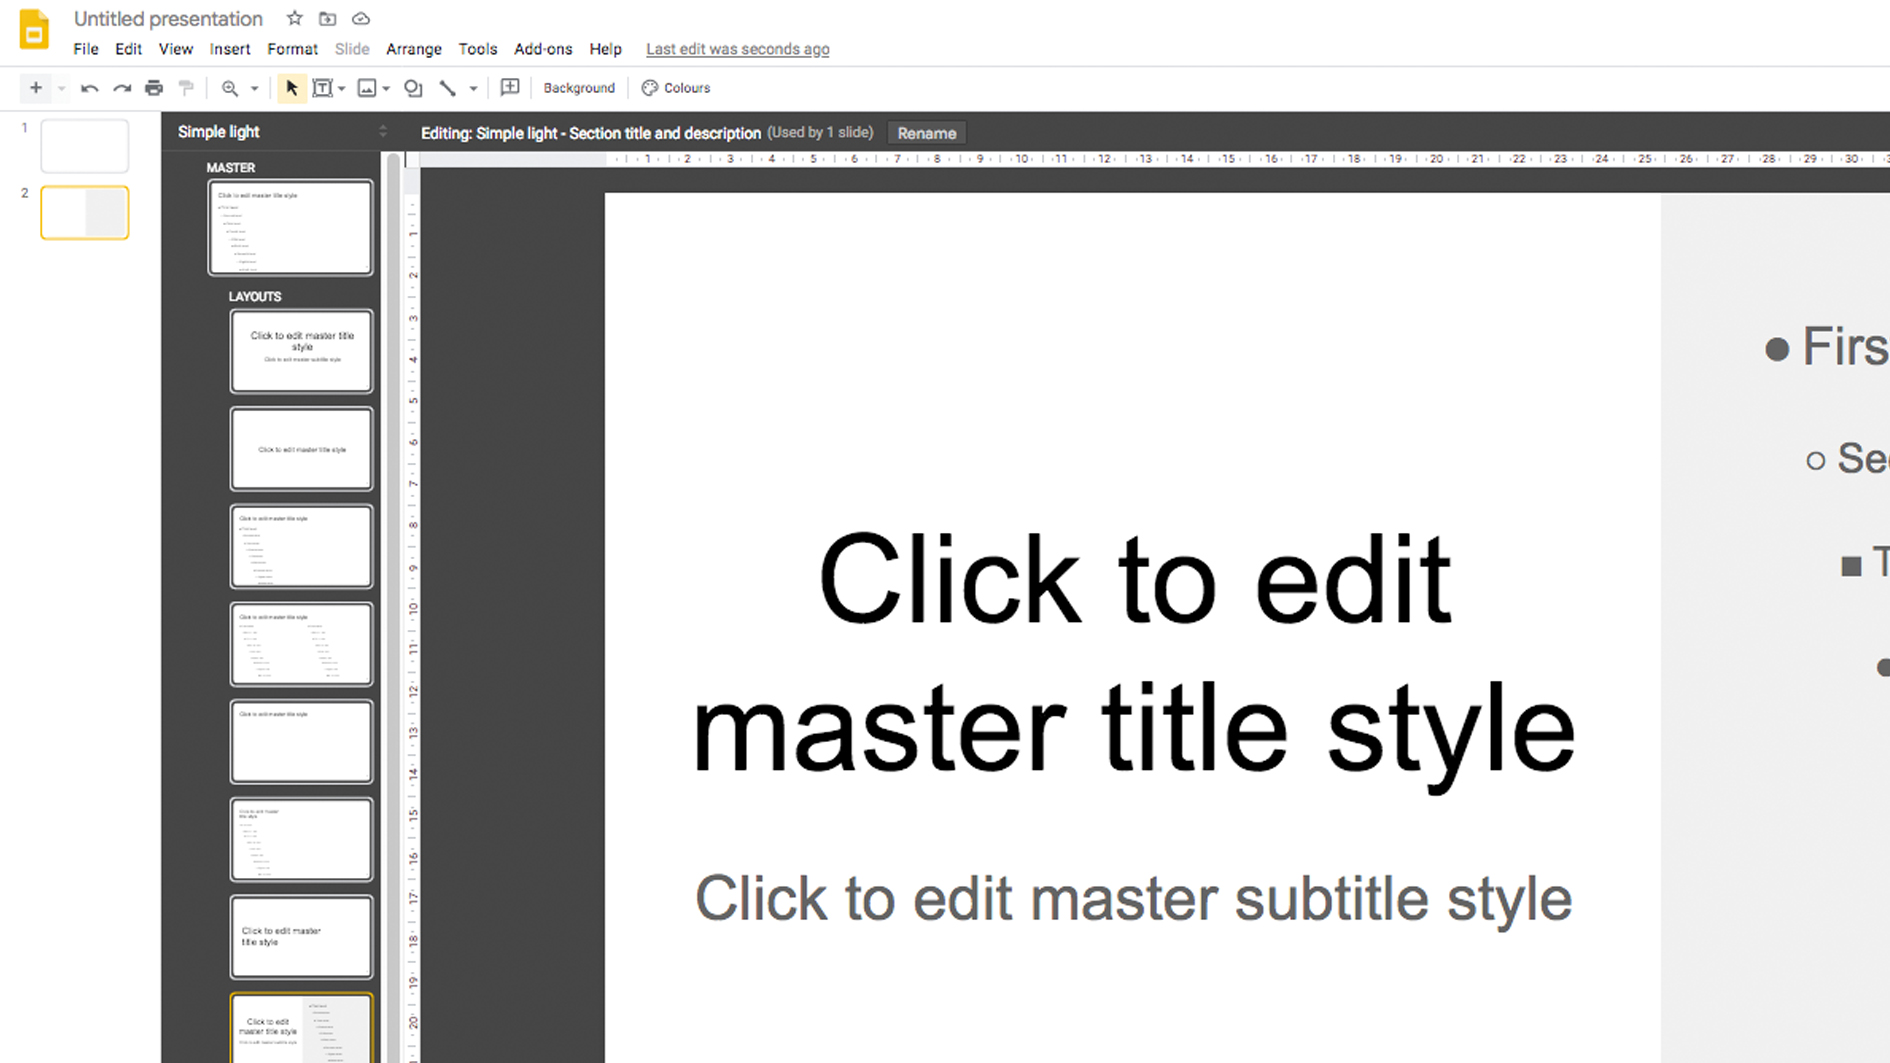
For any design project with multiple templated pages, it is important to set up a master page style, which defines how the presentation will look. You can access your master pages in View > Master or Slide > Edit Master, which will open the Master template editor. The slide at the top of the page is the Master Slide, which is the basic template for the entire presentation – editing this will affect every slide in the presentation. You should use this for elements you want to appear on every page, like your logo, business name or contact details. Below this are the Master layouts, which can be applied to specific slides.
You can edit pre-existing layouts or select a Theme similar to what you want. If neither of these appeal to you, create your own new design by clicking the plus icon in the top-left of the screen or by right-clicking in the black space around the layouts list and selecting 'New Layout'. Alternatively you can select the 'Blank Template' option when creating a new slide.
If you have access to professional design apps, such as InDesign, it can be easier and quicker to design your template in your chosen software, then apply it in Google Slides. If you're feeling particularly lazy, then you can skip all these steps and click the Explore icon in the bottom-right of the Slides page. This will open a panel with a range of layouts that have been auto-created from the content on your slide.
05. Use guides
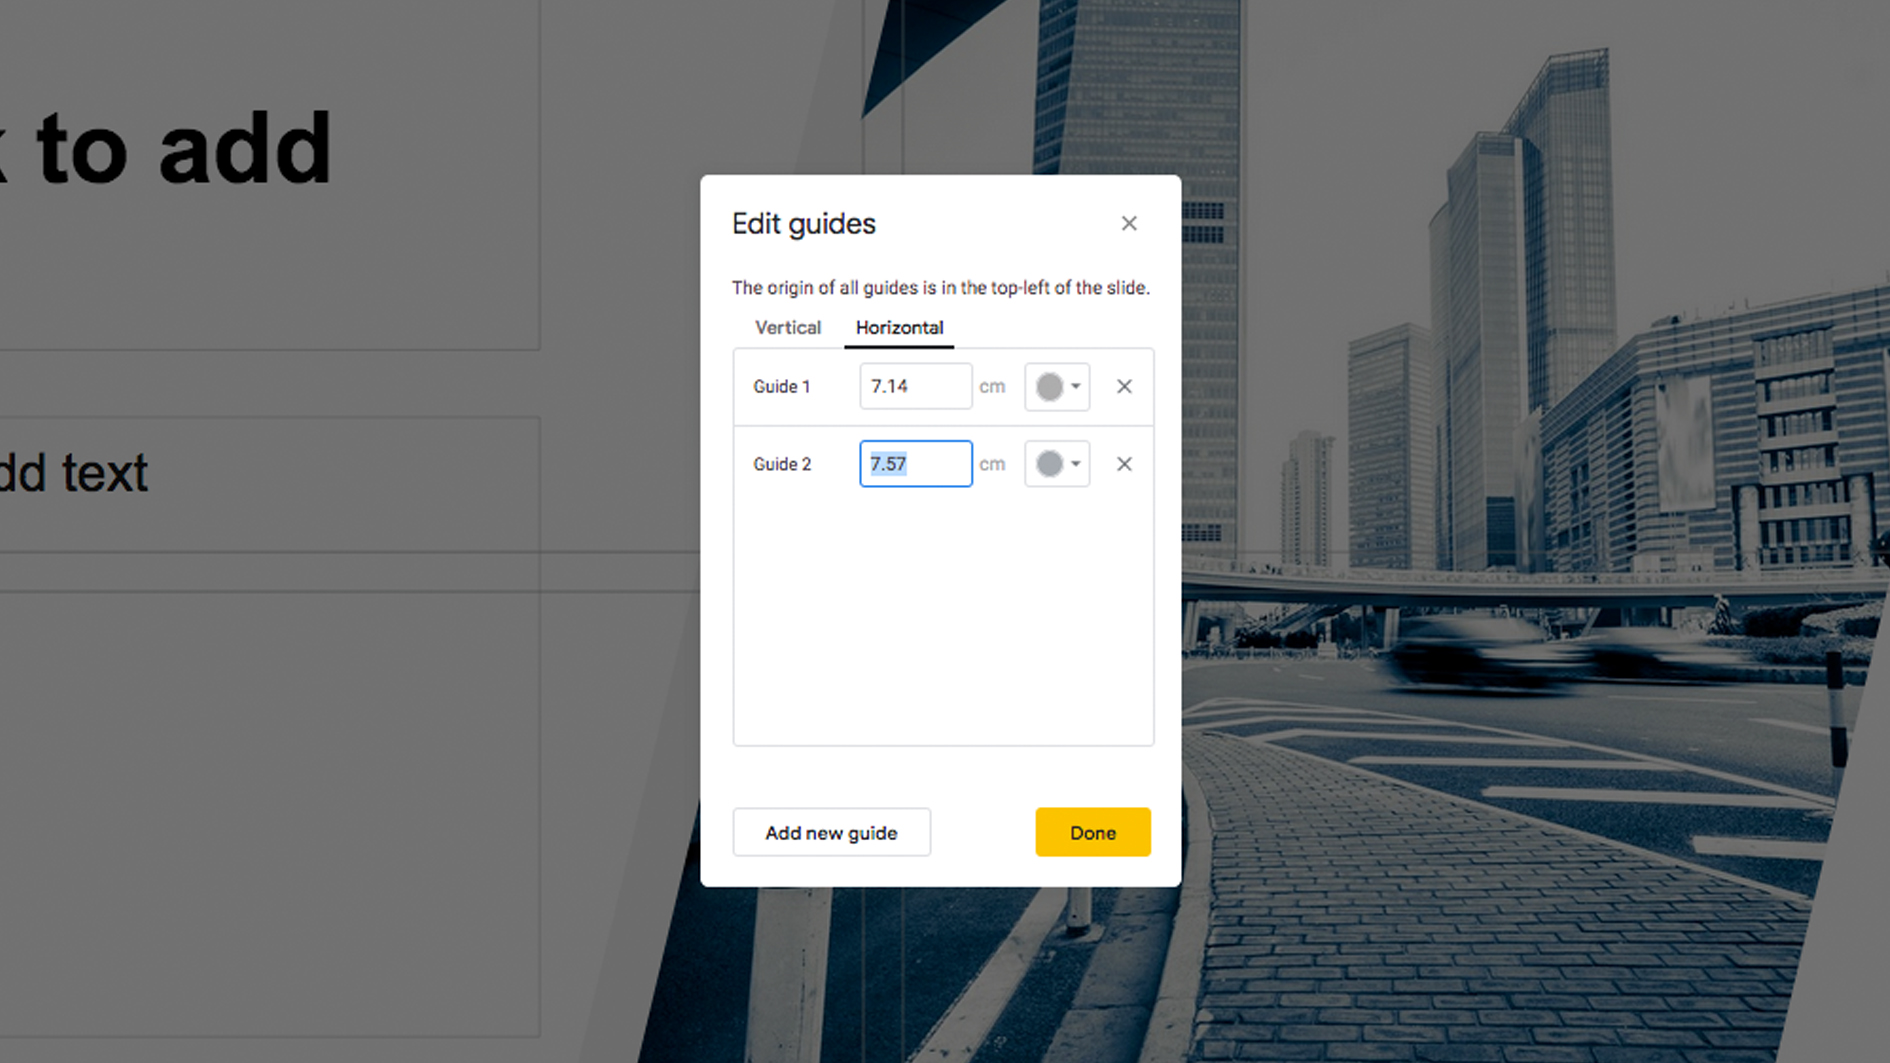
Using guides ensures that all slides are consistent and content lines up. It is best to apply these to the master layouts, so they are regular across all slides and other users cannot accidentally drag one out of place. Make sure you have 'view guides' and 'snap to guides' turned on, through View > Guides > Show Guides and View > Snap to > Guides.
You can add guides manually by dragging out from the rulers to the top and left of the page, but it is more precise to add them through View > Guides > Edit Guides. In the Edit Guides window you can add multiple guides and assign specific positions. Unfortunately the software doesn't recognise pixels as a metric, so you will have to set these using centimetres (though you can work out the relative pixel coordinates using some quick ratio maths).
06. Add content
The tools used in creating master pages are the same as those used in slide design. Click on Background in the toolbar to select a background colour or upload an image to use. Any image should be scaled to the correct dimensions beforehand or it will be stretched to fit the page by the software.
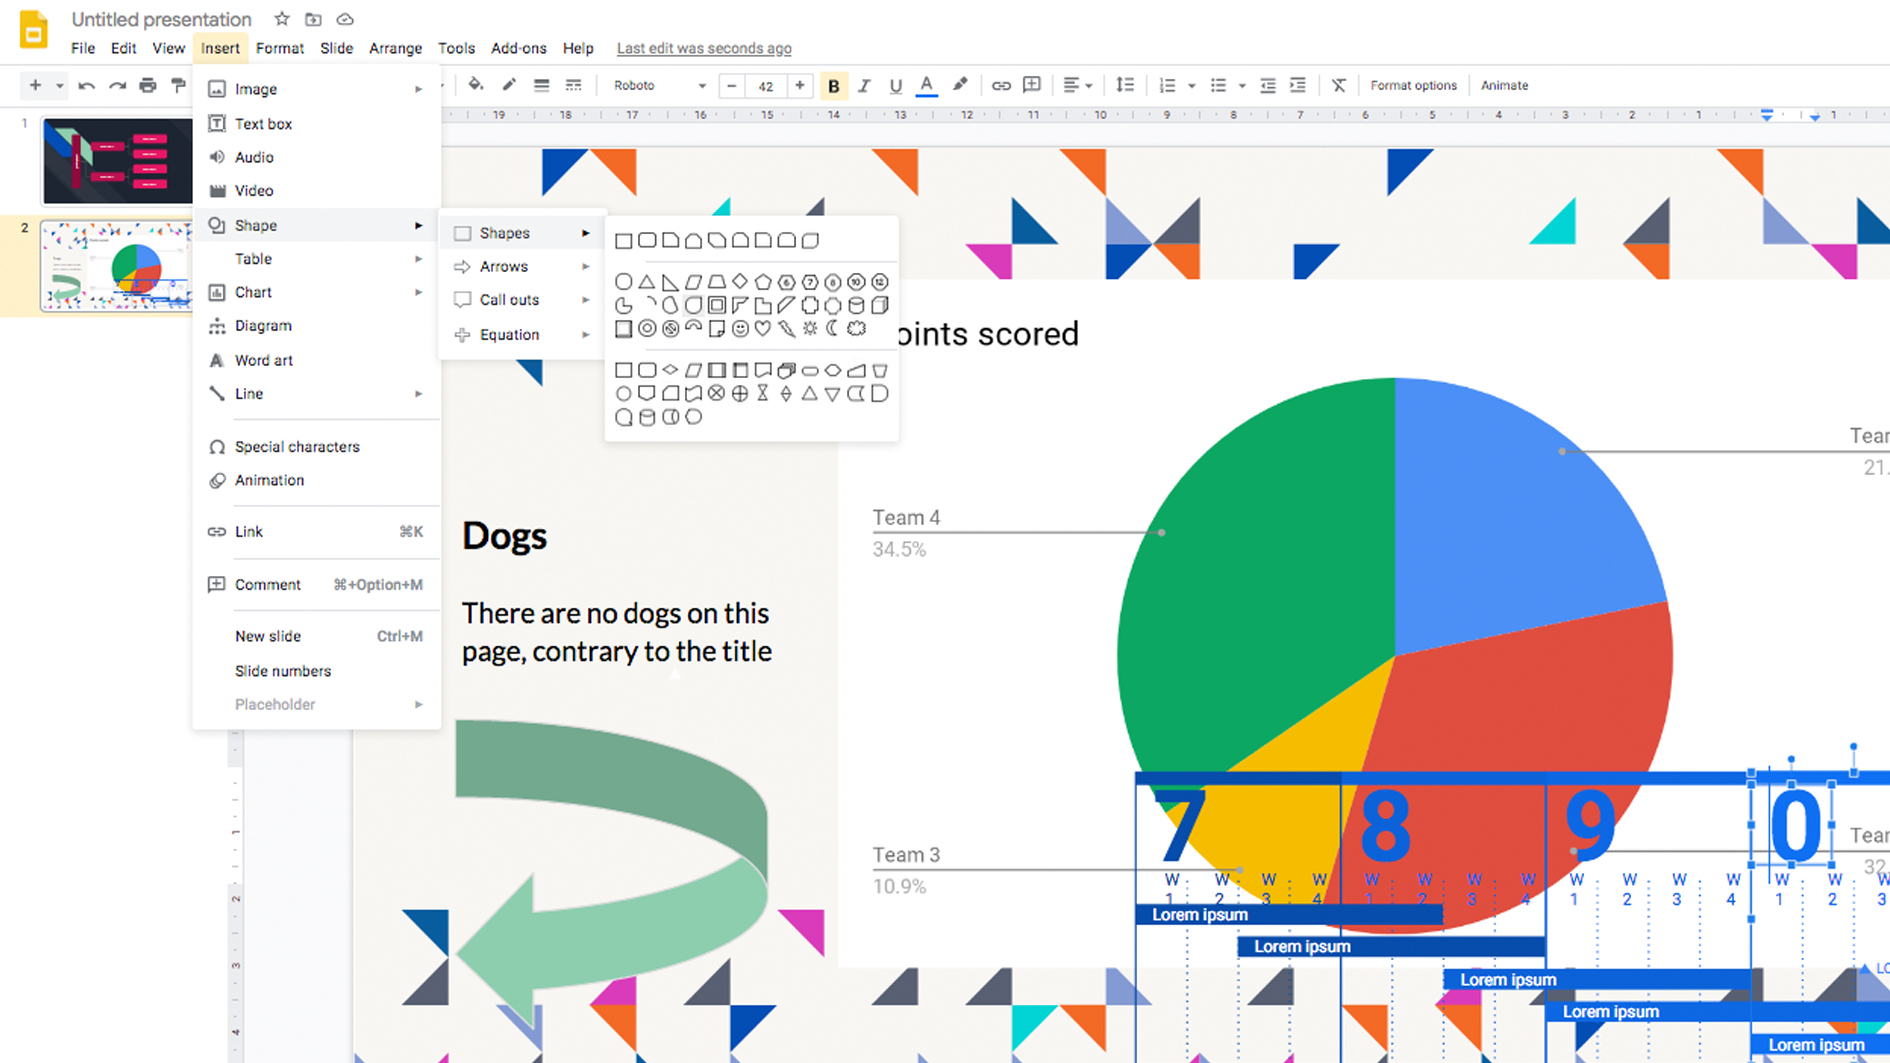
You can insert content either through the Insert tab in the menu bar or by using the tool icons in the toolbar. They are all quite self-explanatory, but there are quite a few to choose from – Image, Text box, Audio, Video, Shape, Table, Chart, Diagram, WordArt or Line. It is worth experimenting with each of these and seeing what you can achieve.
The Arrange menu will help form a structure with the content, allowing you to align multiple objects along the same axis in respect to each other or the slide. It also contains the controls for bringing objects to the front or back, as well as grouping objects together.
If you're opening someone else's document and wish to download content, you have to right click and 'Save to Keep' (remember those three little icons on the right) and then save to your computer from the Keep panel.
At this point you should have an operational Master page, so may wish to save your document and use as a template for other projects. Once saved, you can import it into other documents as a Theme.
07. Use the format panel
The Format options tab will become available whenever you have an object selected. It is a convenient addition to speed up workflow and a good panel to keep open most of the time. You can open this tab by clicking on the Format options button in the toolbar or going to Format > Format options. The panel gives you options to edit size, rotation, position, text fitting, drop shadow and reflection of objects. If you already have a master page set up with guides then size, rotation and position won't be too useful, especially as you can perform the same actions manually on the page (helped by the fact that objects automatically snap to the edges of other objects).
Text boxes come with .25cm padding as default, which can make it awkward when trying to line things up, so it's worth removing this in the Padding section. In this section you can also alter indentation, which will come in handy if you want to add bullet points or numbered lists. Drop Shadows and Reflection are a personal choice – but it is worth remembering that overuse can look tacky and dated.
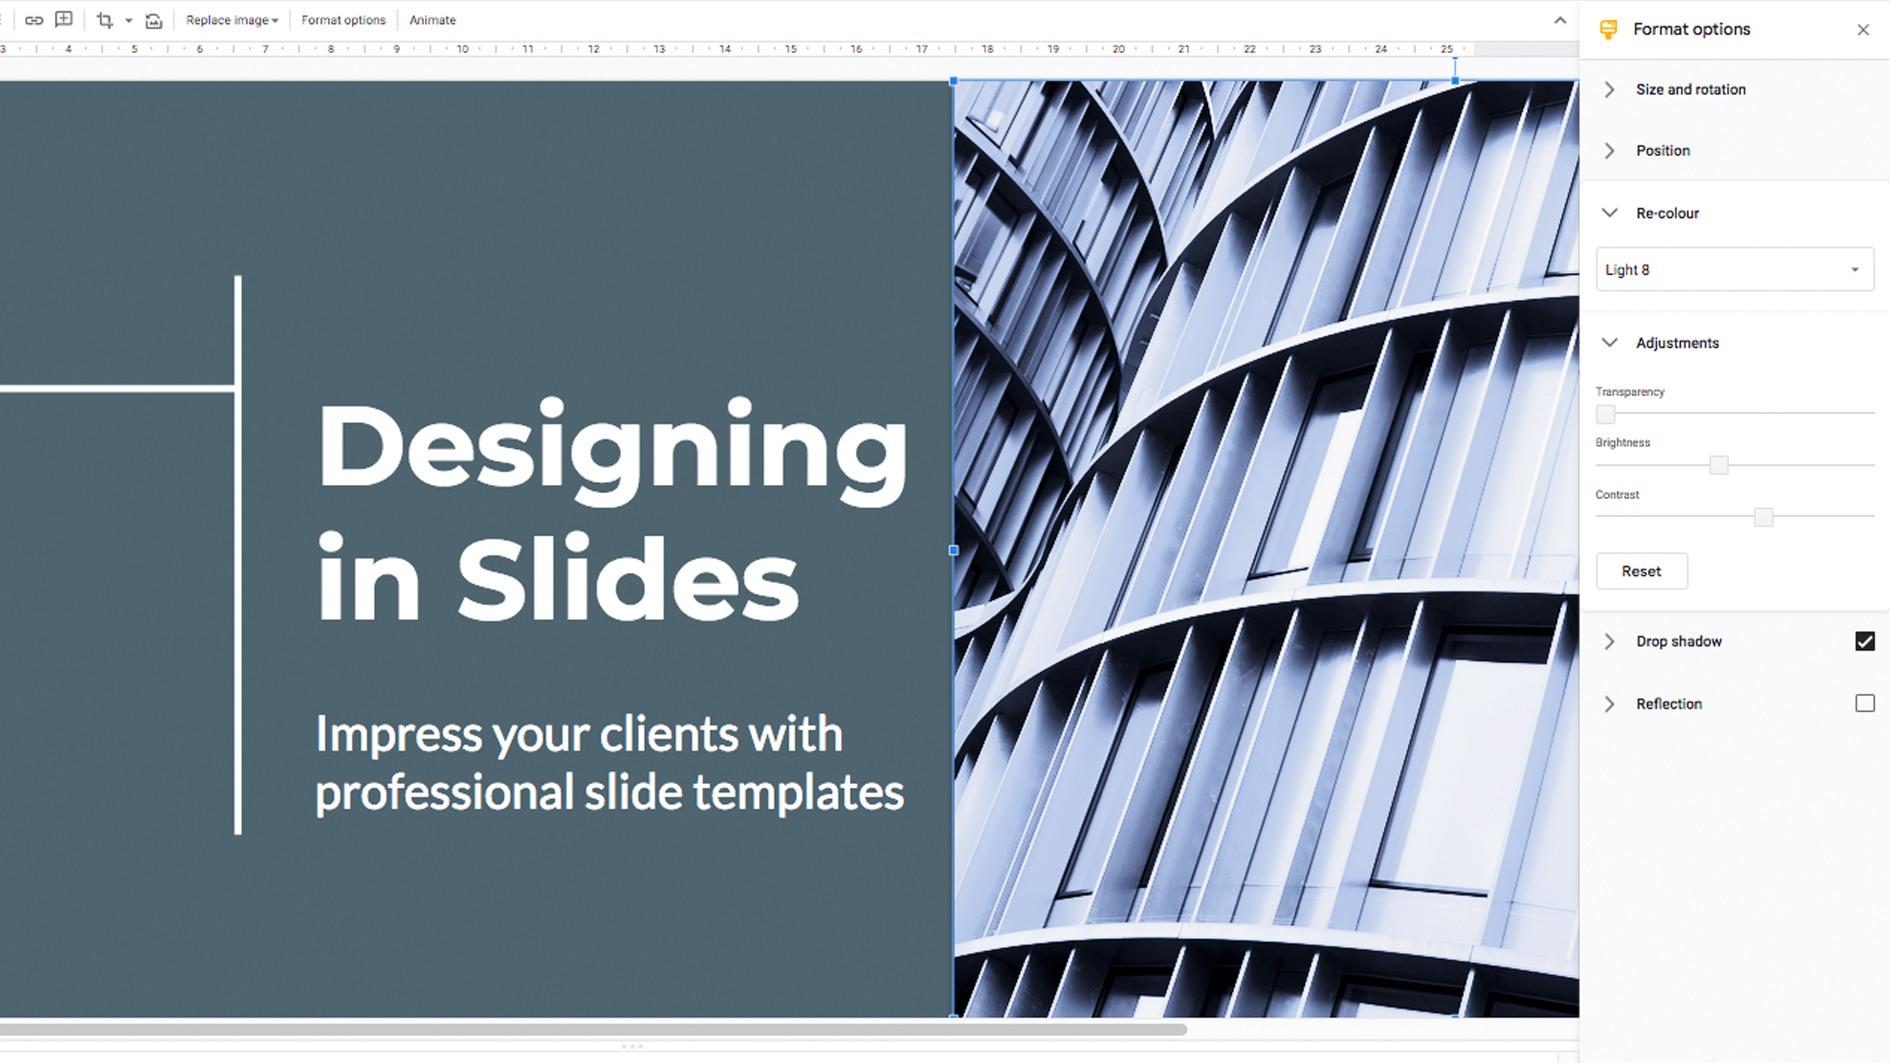
When an image is selected, the options are slightly different – as well as Size, Rotation and Position, there is also Recolour and Adjustments, which gives you some very basic image editing capability.
As well as the Format options tab, there are other tools that can be accessed in the Format menu or in the toolbar. Align lets you choose how you want your text orientated (not to be confused with the align tool under Arrange) – both horizontally and vertically. Line Spacing adjusts the space in-between lines of text (also known as leading), offering a few basic options as well as a custom window, where you can enter your own specific sizes. By adding 'List item spacing', you can add a space every time there's a new paragraph, which comes in useful if you're not using indentations to mark new paragraphs.
08. Add fonts
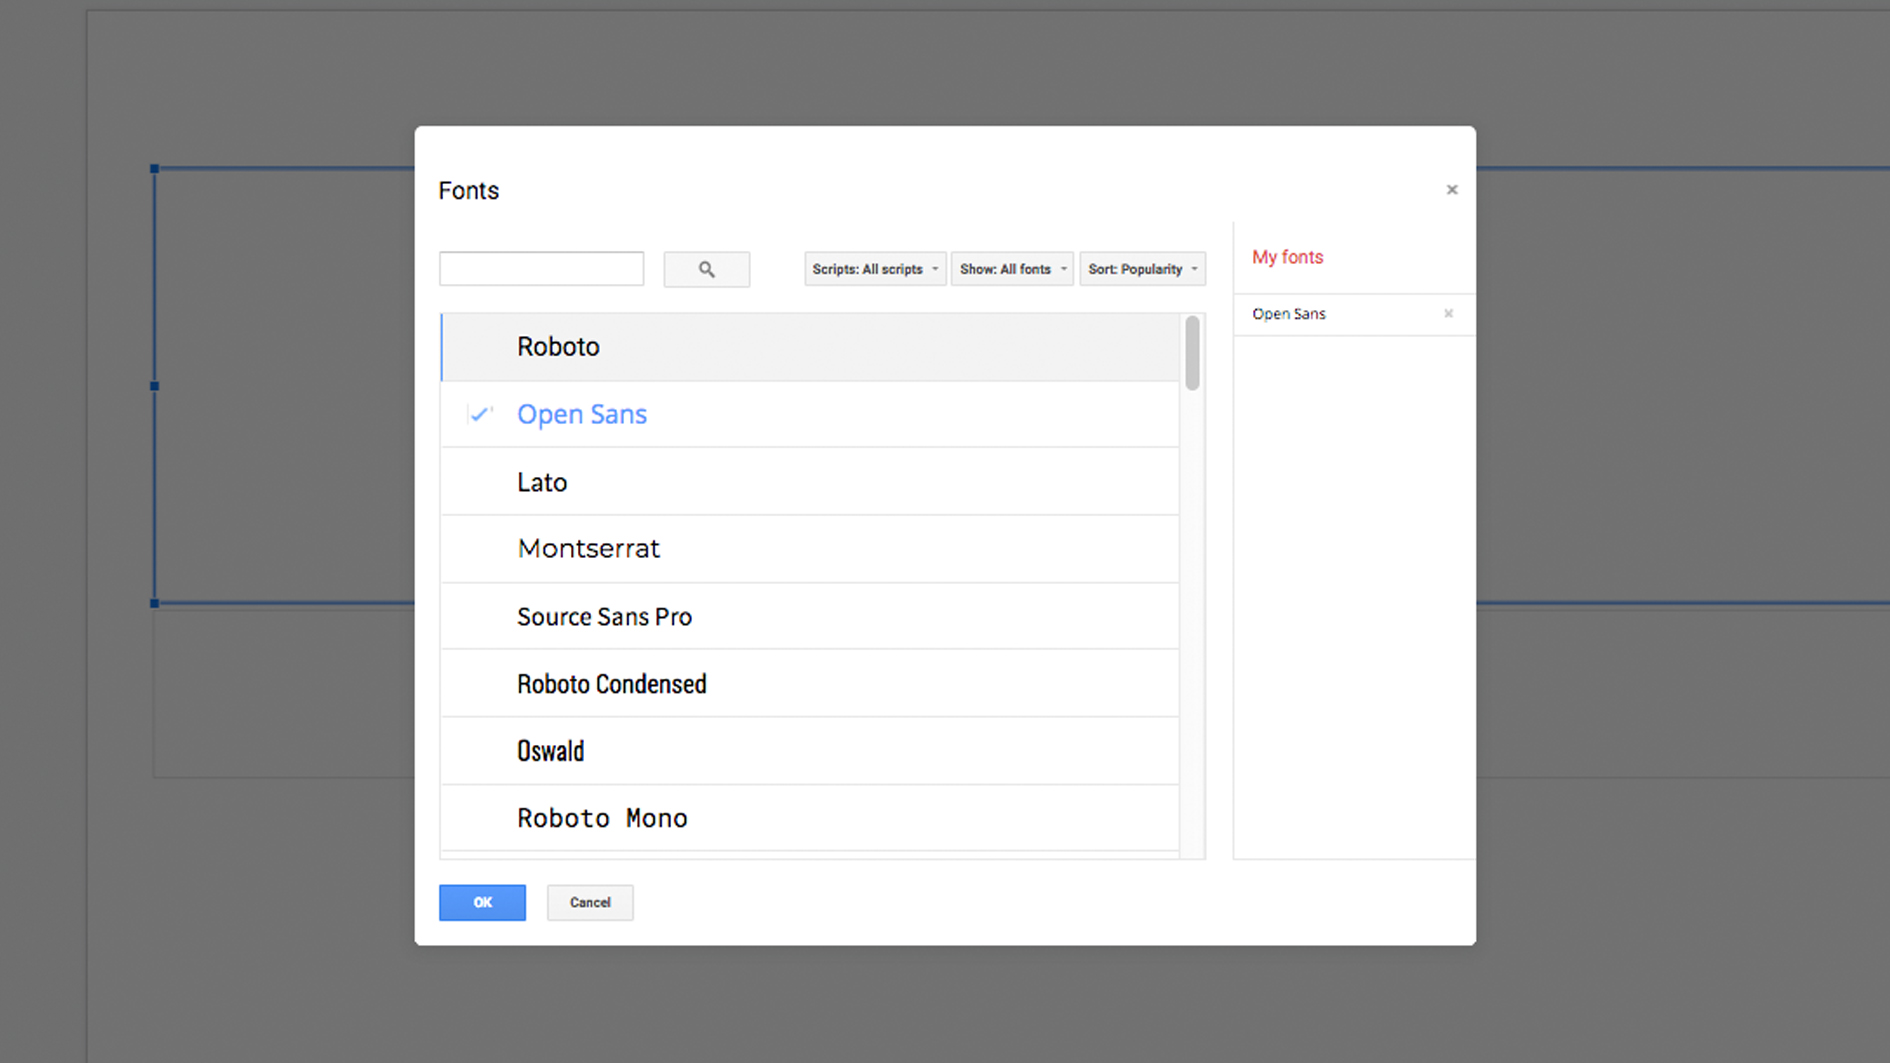
The style of your document will largely depend on personal preference or observing brand guidelines. Google doesn't currently allow you to upload custom fonts to Google Slides, so you may be forced to switch to similar alternatives. This isn't much of a problem as you are given the most commonly used fonts in both Google and Microsoft. If you aren't happy with the ones that come as standard, you can add more fonts by clicking the option at the top of the fonts drop-down menu. This opens a window where you can search for a specific font or filter the list by style or popularity.
The toolbar provides options for changing the colour of objects, lines, text and highlights. Each of these gives a basic palette of commonly used colours, a list of the colours used in your Theme and a custom button, where you can create a new swatch colour based on a hex code. Only the Fill tab has the option to add a gradient.
09. Create motion
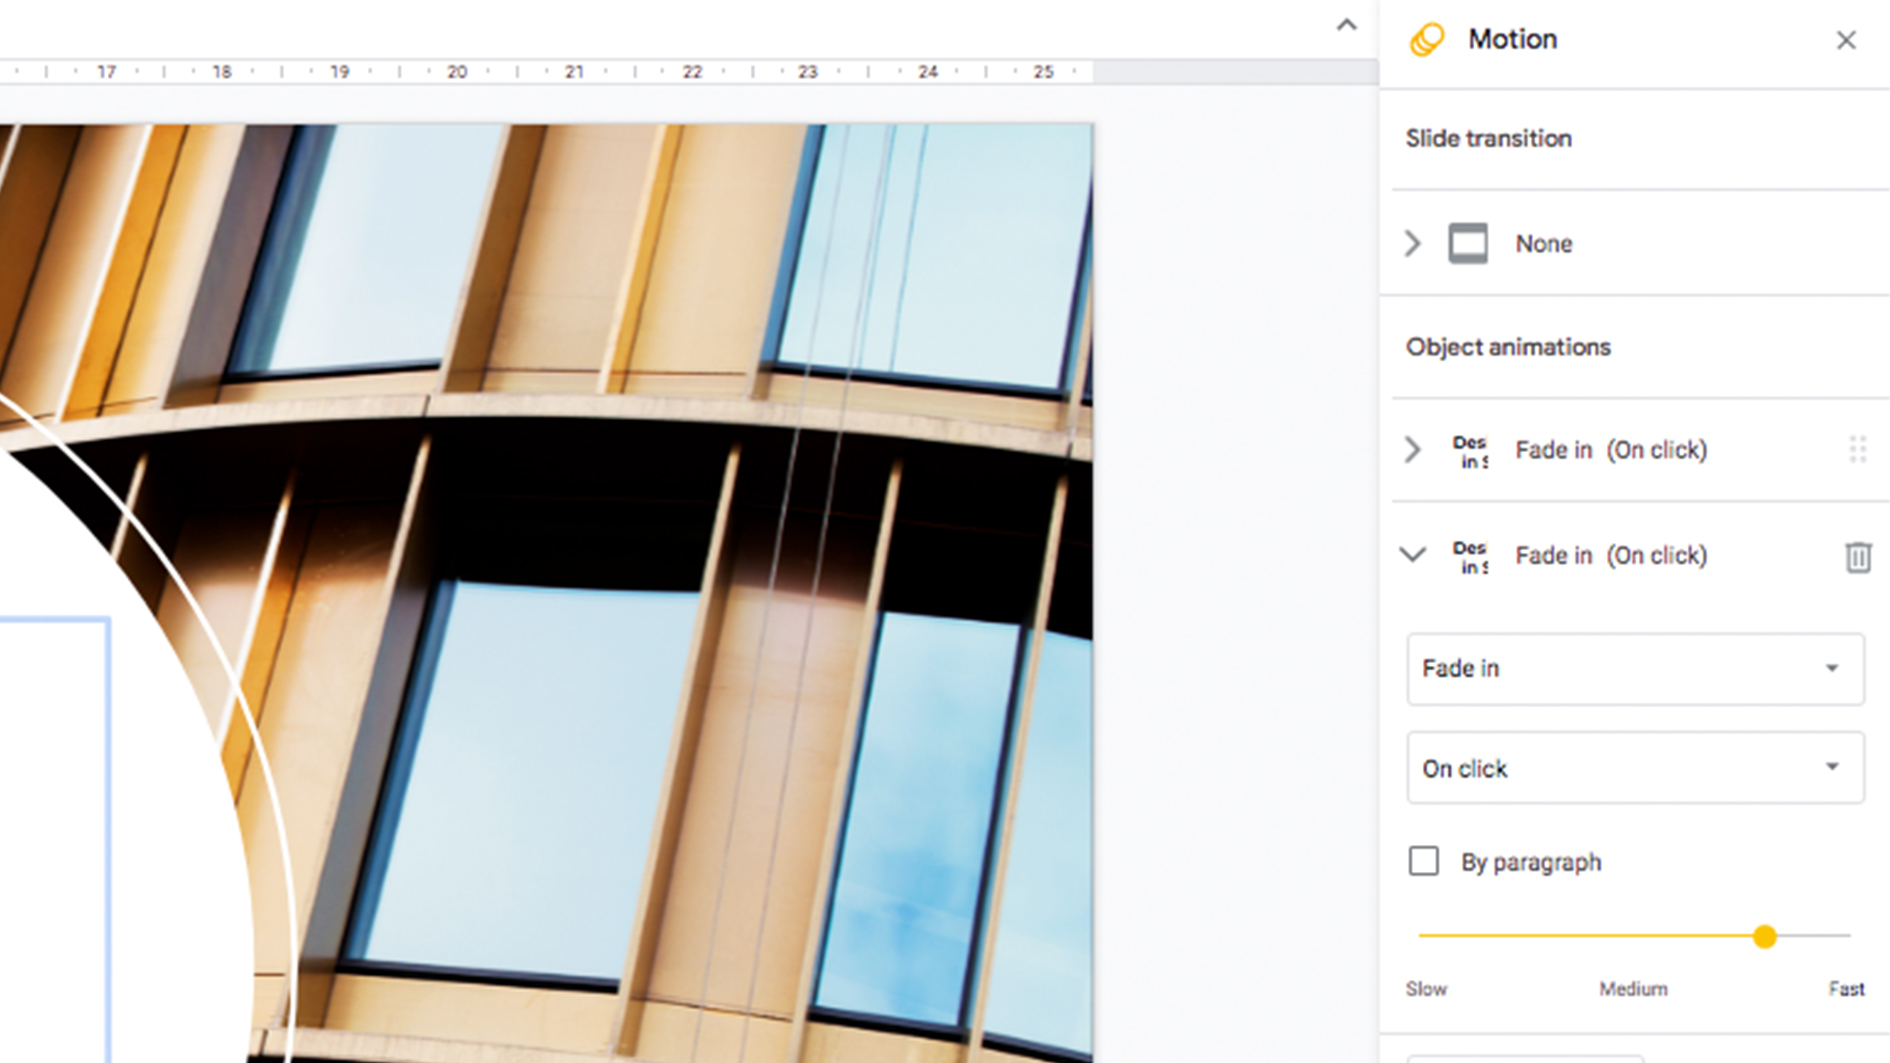
If you intend on using this as a live presentation, it may be necessary to include some form of animation, in order to keep the viewers' attention. You can add slide transitions in the Motion tab, as well as applying individual animations to objects. These should be used sparingly, since too many can be jarring and needlessly time-consuming. There is a modest list of animation options (although you will mostly be using 'fade in') and you can drag animations up and down to decide the timing of elements appearing in and out (if you don't have them set to activate on click).
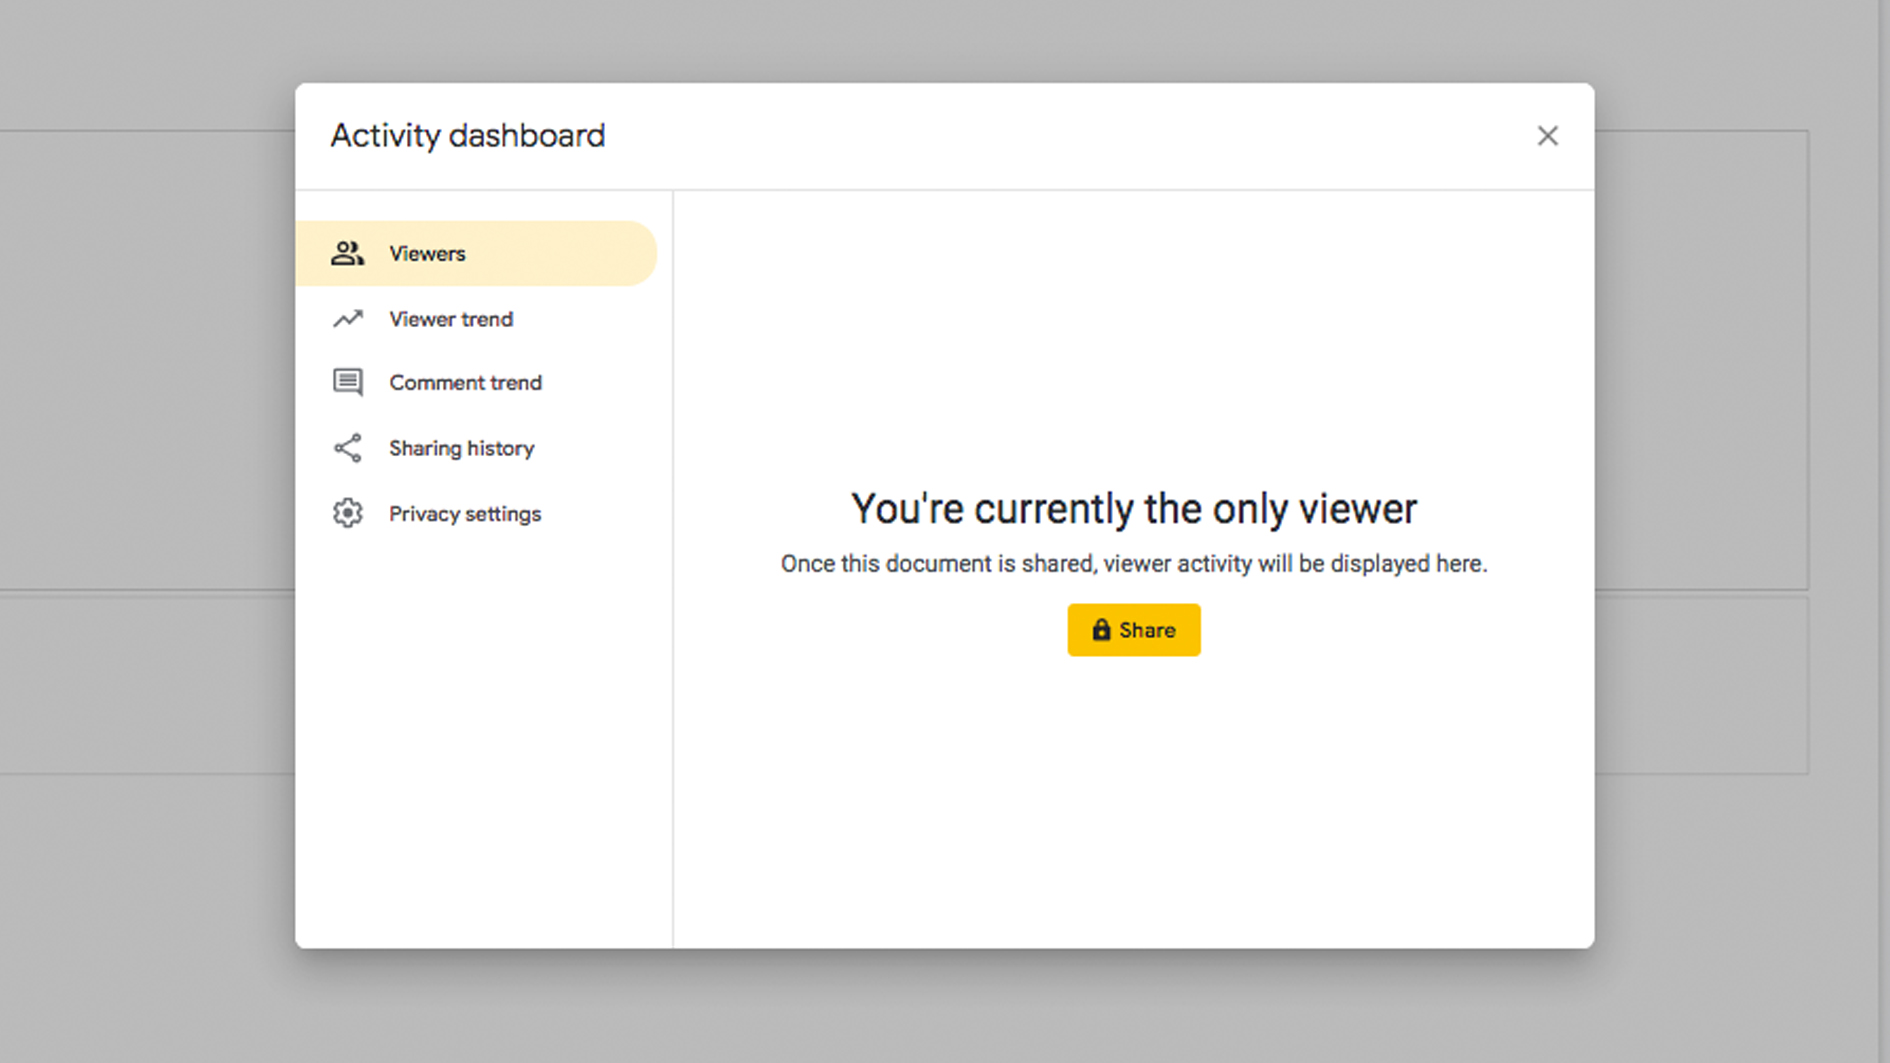
Once you're satisfied with the document, you can export it as the finished article or share with other people for further edits. Adding comments is a good way of making notes on the page, while the Tasks and Calendar tabs help you organise your schedule of tasks. Add a Comment by clicking on the speech bubble icon in the toolbar and typing your message, adding people into the conversation using the @ key. To share the project with someone, go to File > Share and send via email. You can check any changes that have been made, and who made them, in File > Revision history, as well as the statistics of your project in Tools > Activity dashboard.
The document can be downloaded or sent in various formats, including PDF, ppt and jpg. You can also publish to web.
11. Use shortcuts and add-ons
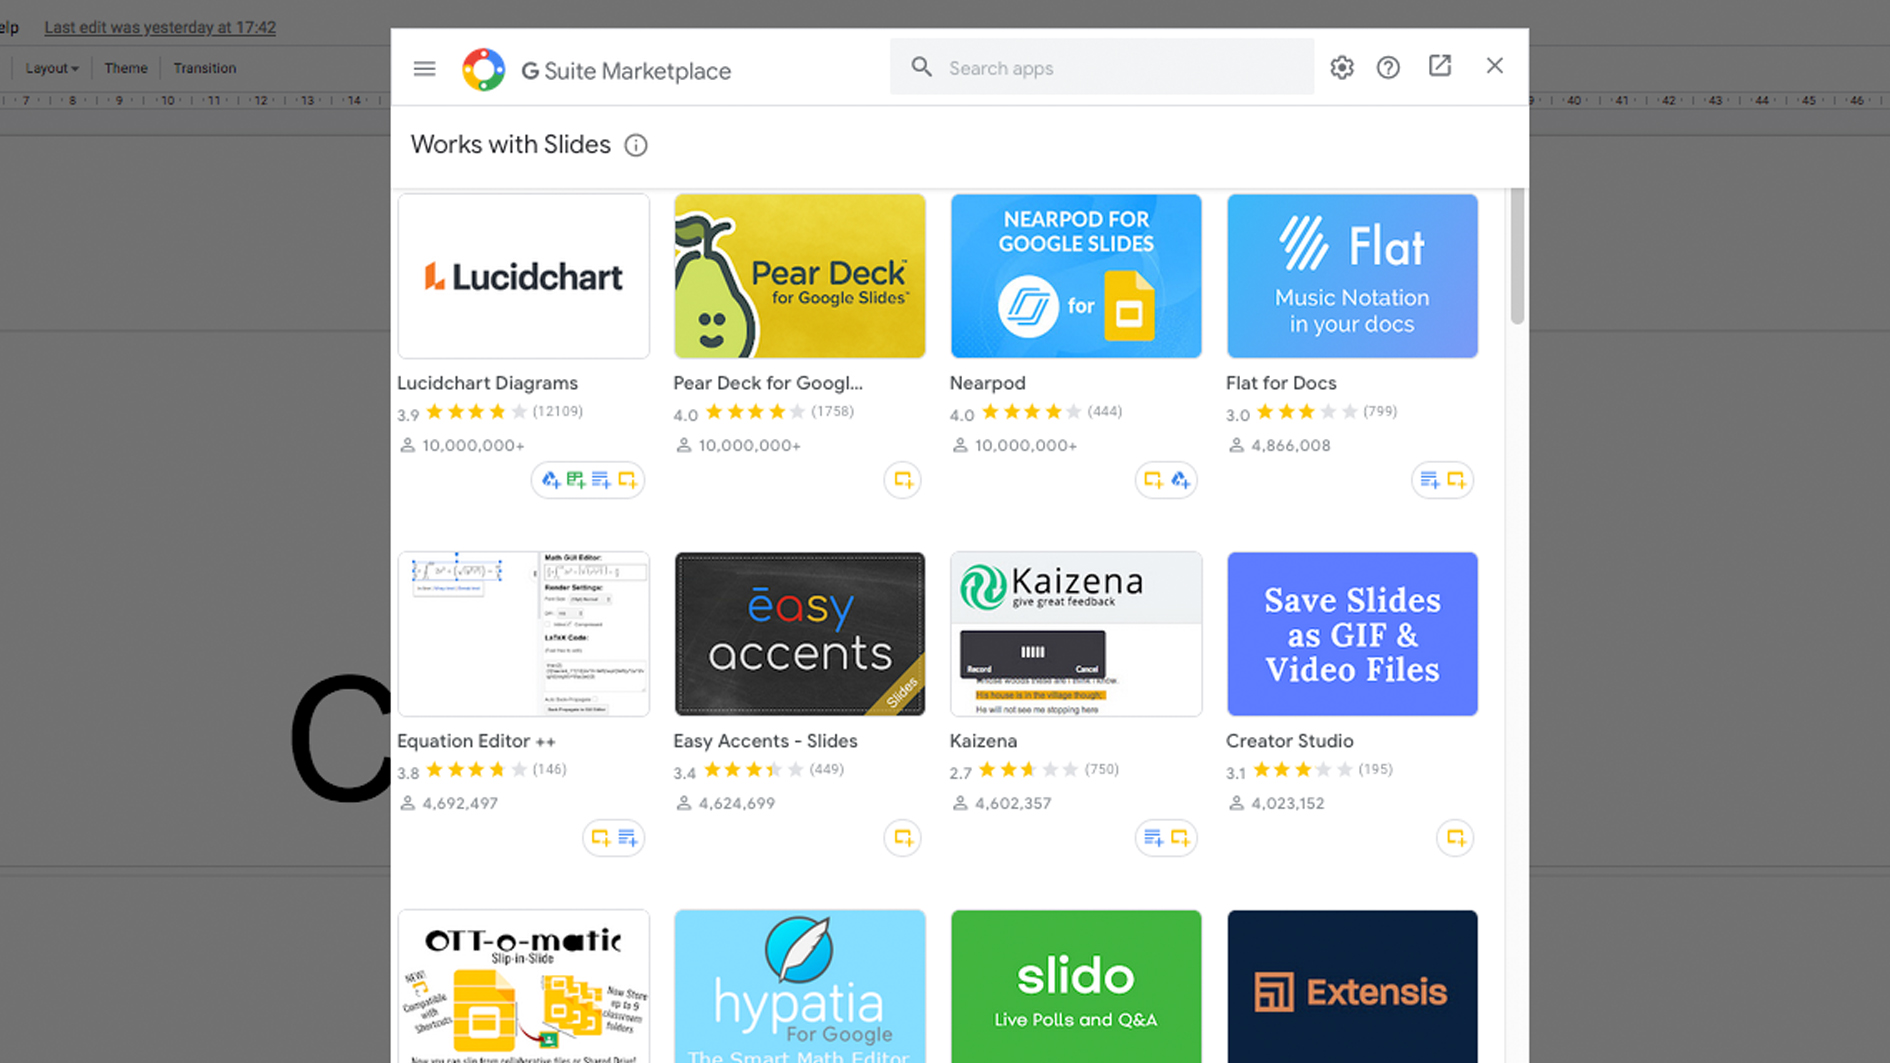
If you want to take your document to the next level, it is worth browsing Add-ons > Get add-ons. If you're feeling techy, there is a script editor in Slides, but it is easier to let experts do the hard work for you. Add-ons can include anything from live polls and translators to adding simple icons and accents.
As with any app, there are a range of shortcuts to utilise and speed up your workflow. For the most part these will seem familiar, such as cmd + v to paste or holding down Shift to maintain aspect ratio when resizing. But others are slightly different from the standard shortcuts used elsewhere. For example it is cmd + opt + G to group objects, where in other apps it would be cmd + G. You can check the list of shortcuts in Help > Keyboard Shortcuts (or by pressing cmd + /).
Read more:
- The 36 best Google Doodle designs
- Did Google just copy Apple's new iPad Air colours?
- 39 InDesign tutorials to level up your skills

Matt has worked for various publishing houses and design agencies, covering studio photography, video production, editorial design, branding, illustration and motion graphics. He currently works for Future PLC with brands such as T3, Woman&Home, Marie Claire, Music Week, TechRadar, Golden Joysticks, Cycling Weekly, Brand Impact Awards, Horse&Hound and Tech&Learning. In the past he has designed titles including Mac|Life, IQ, Bow International, Drummer, iDrum, Acoustic, Clay Shooting, Sea Fishing and GunTradeNews. He has experience across the full Adobe Suite and is currently spending a lot of time creating projects in Blender and After Effects.
Related articles
design elements are used to make a document more
Source: https://www.creativebloq.com/how-to/google-slides